Electric Hand/Emergency/Parking Brake
In my effort to keep with my production car theme I have decided to go with an electric brake. Some autos have been using them for several years now and some also have an "auto" feature which assist new drivers with the operation of their manual transmission vehicle. I will not be adding an auto feature, however I am adding the standard brake pedal depressed activation.
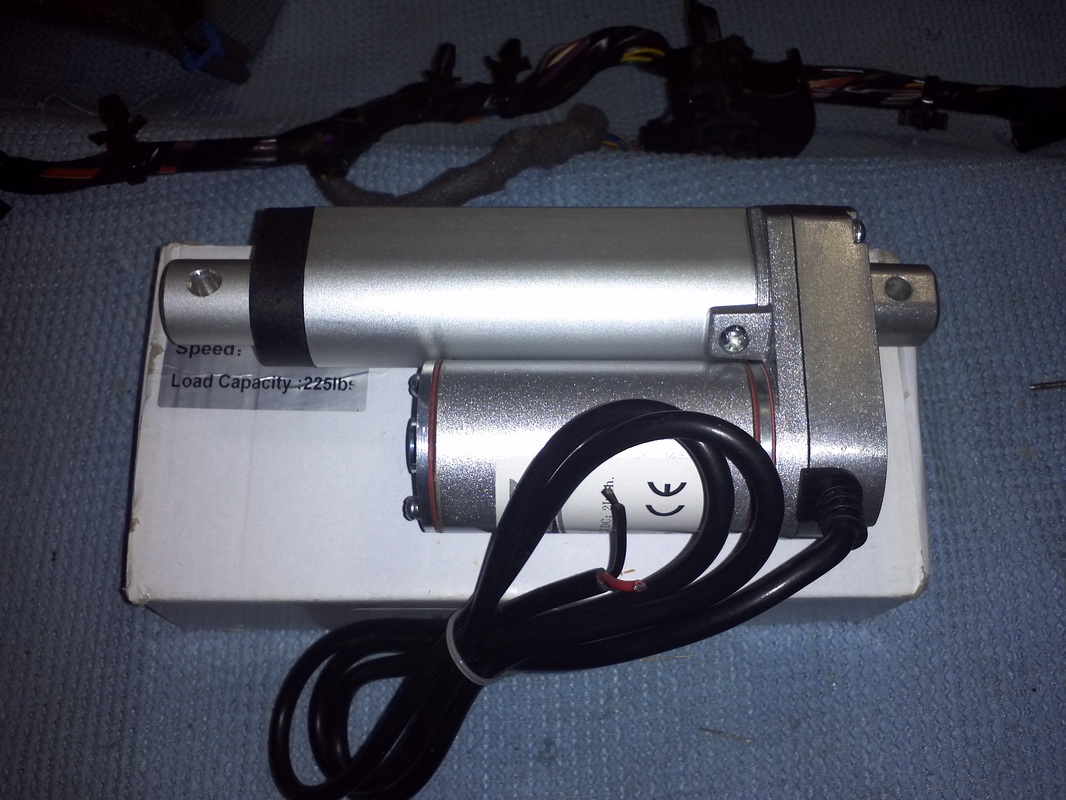
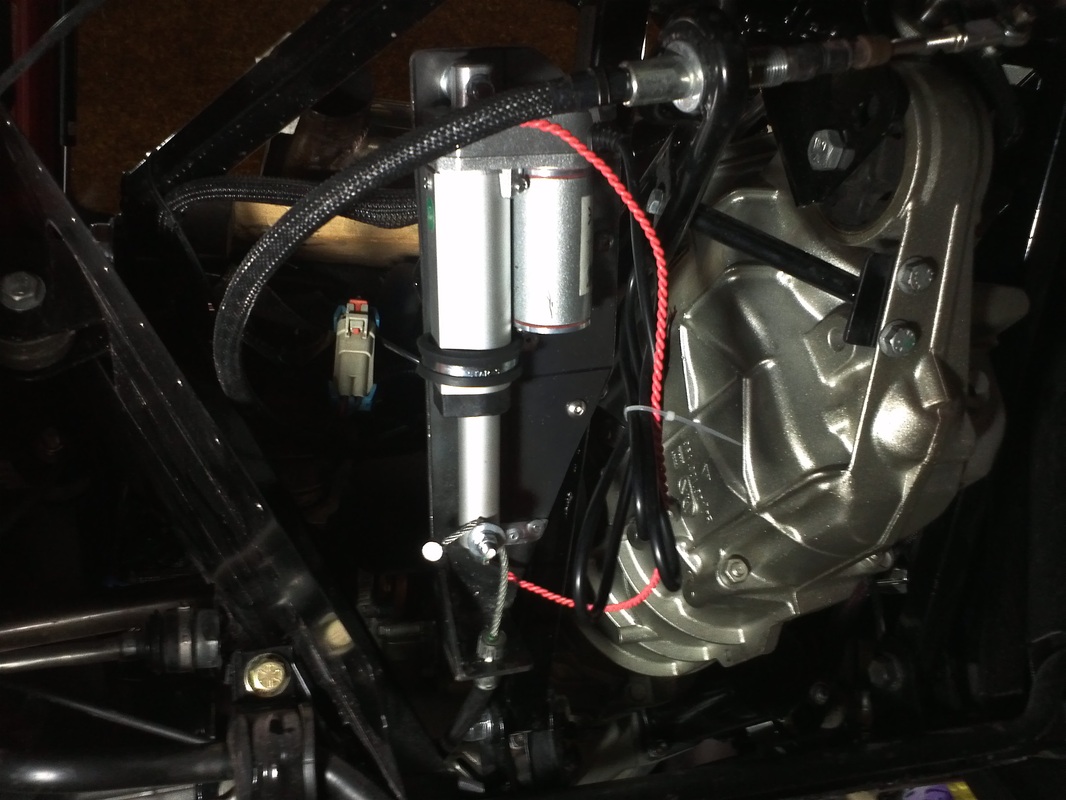
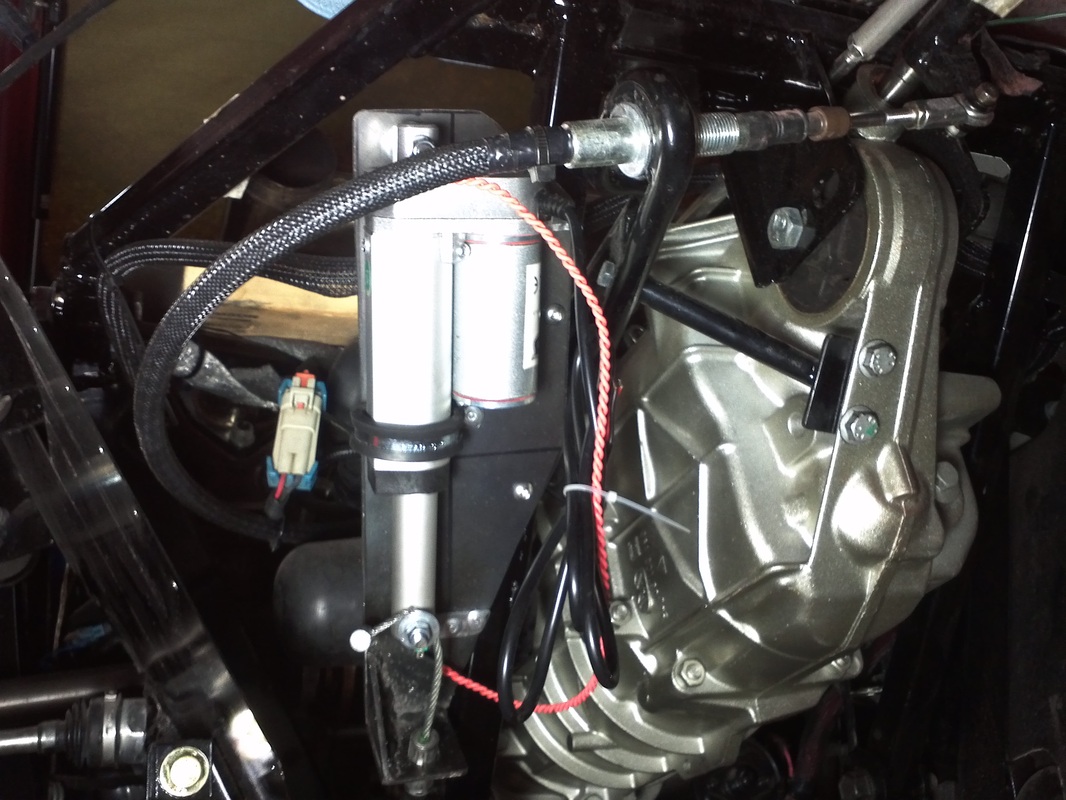
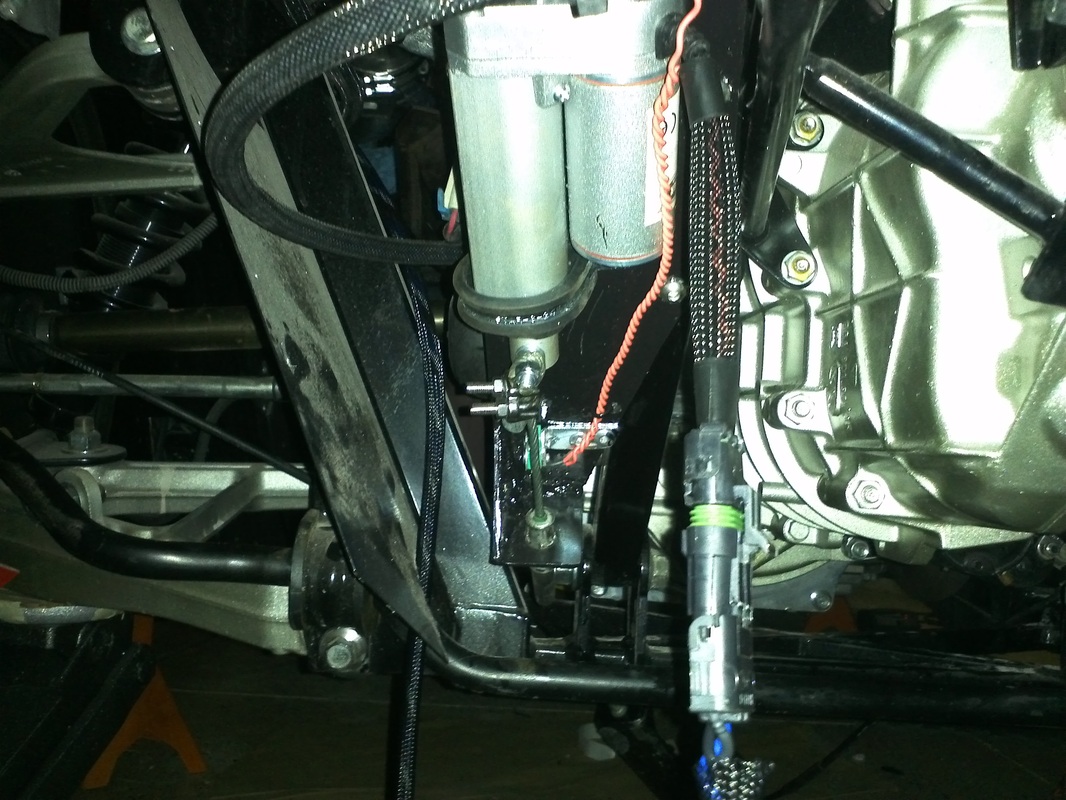
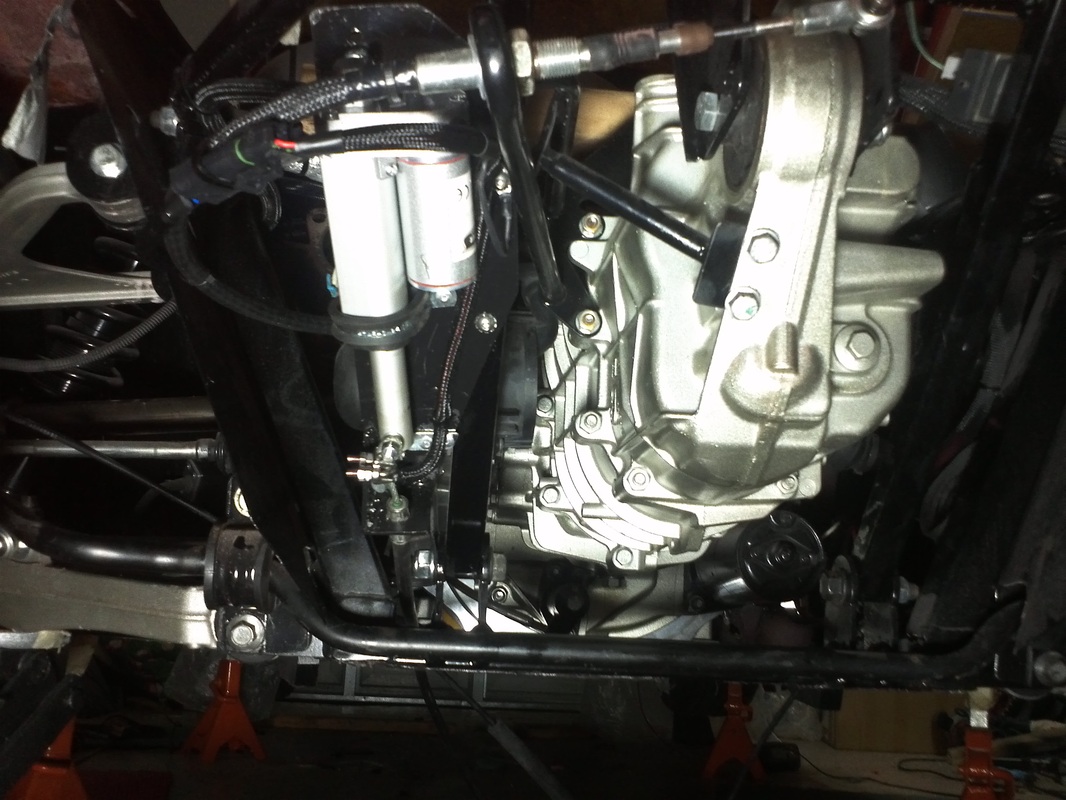
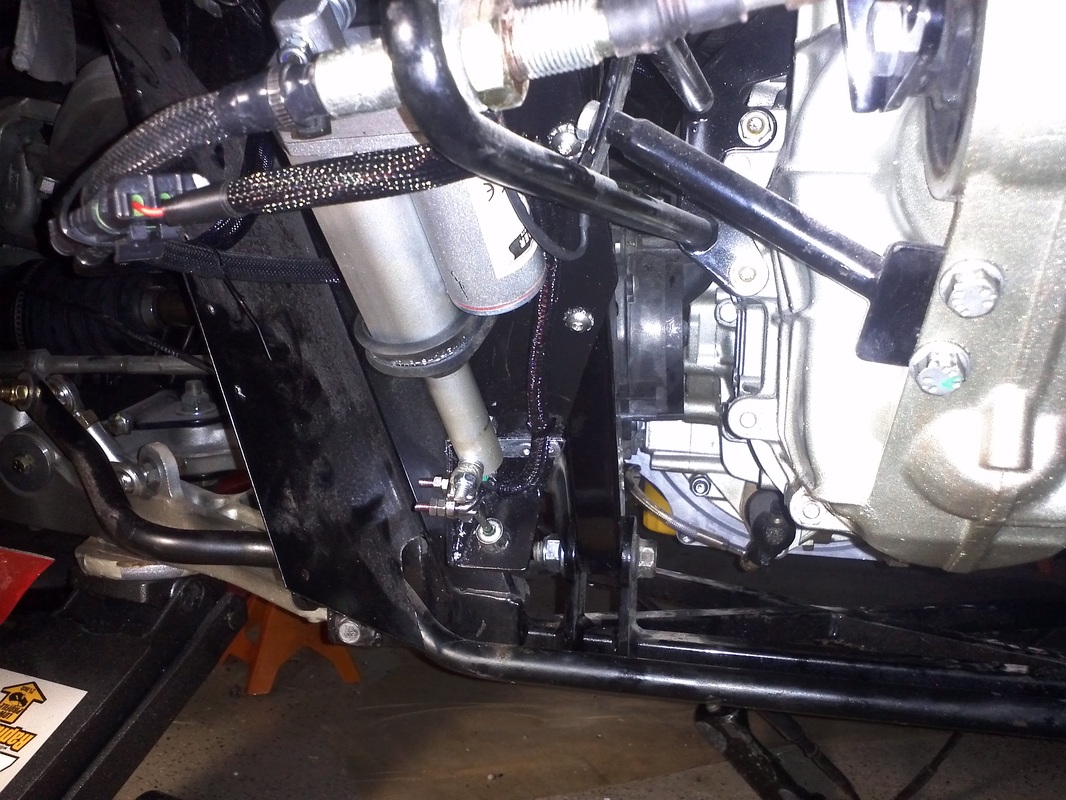
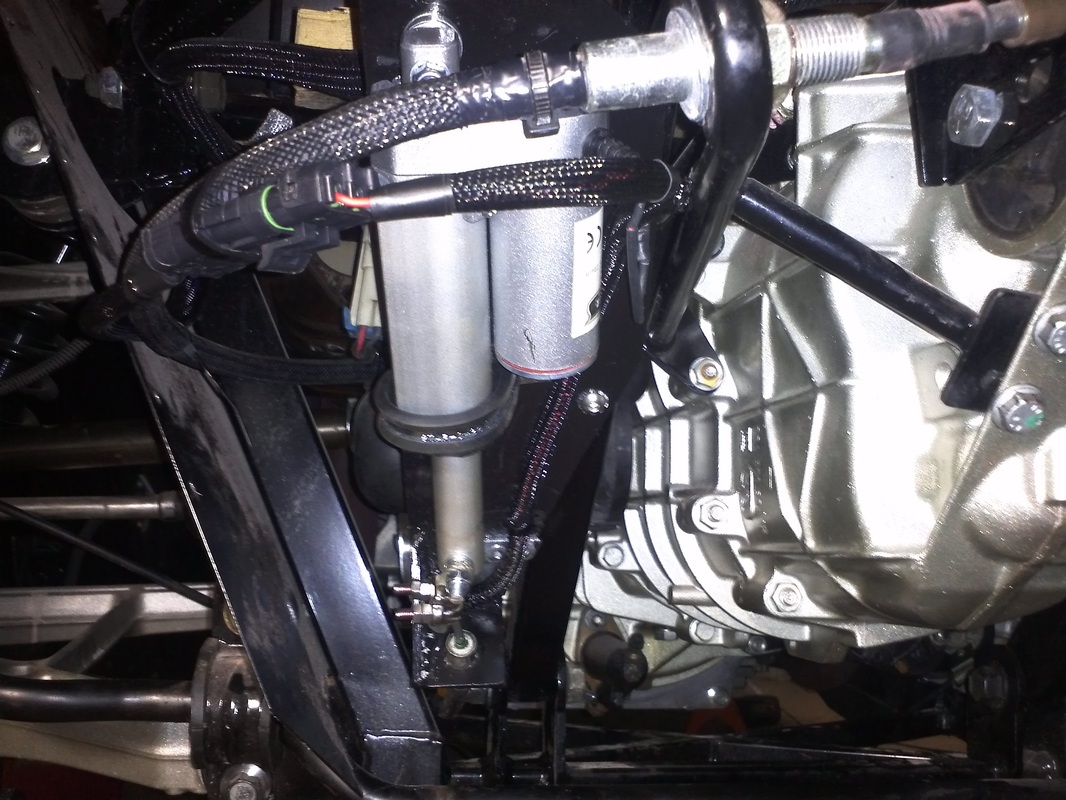
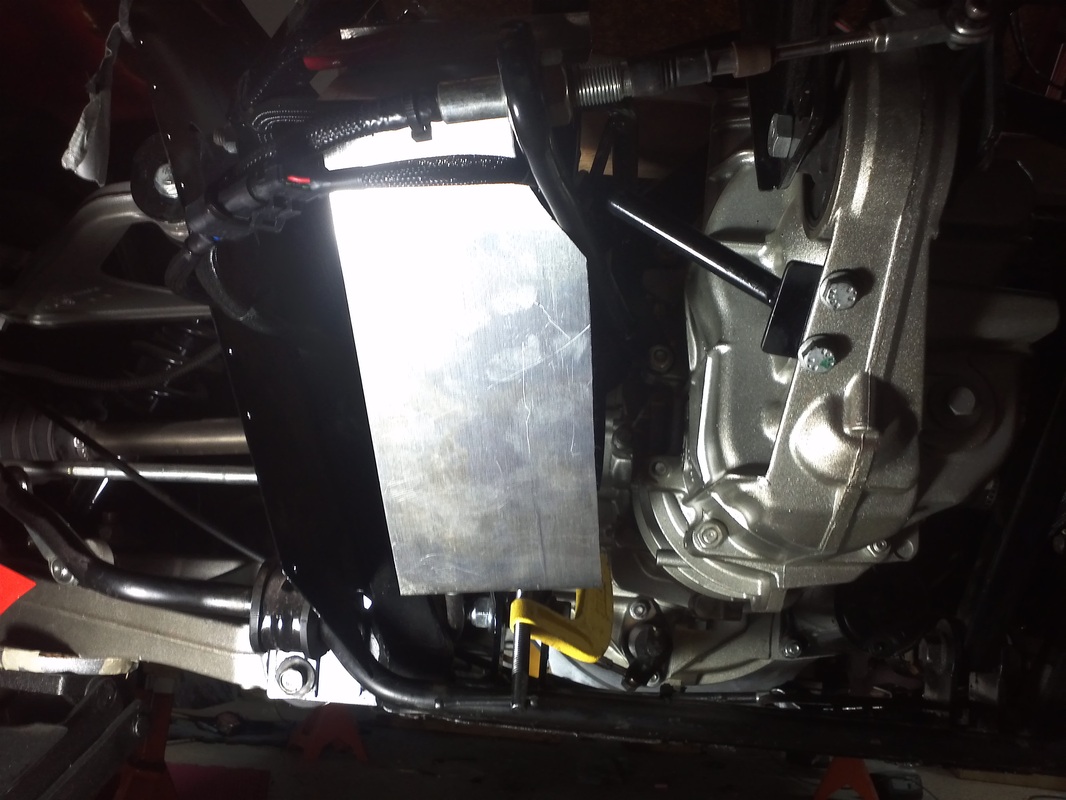
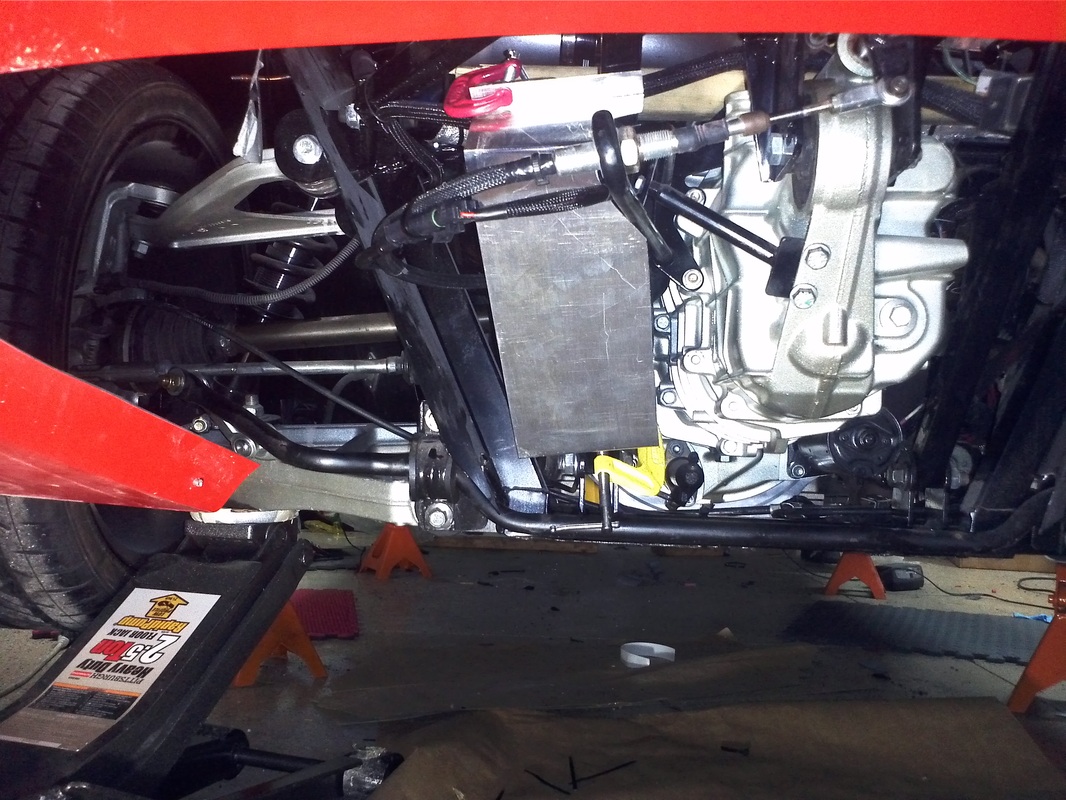
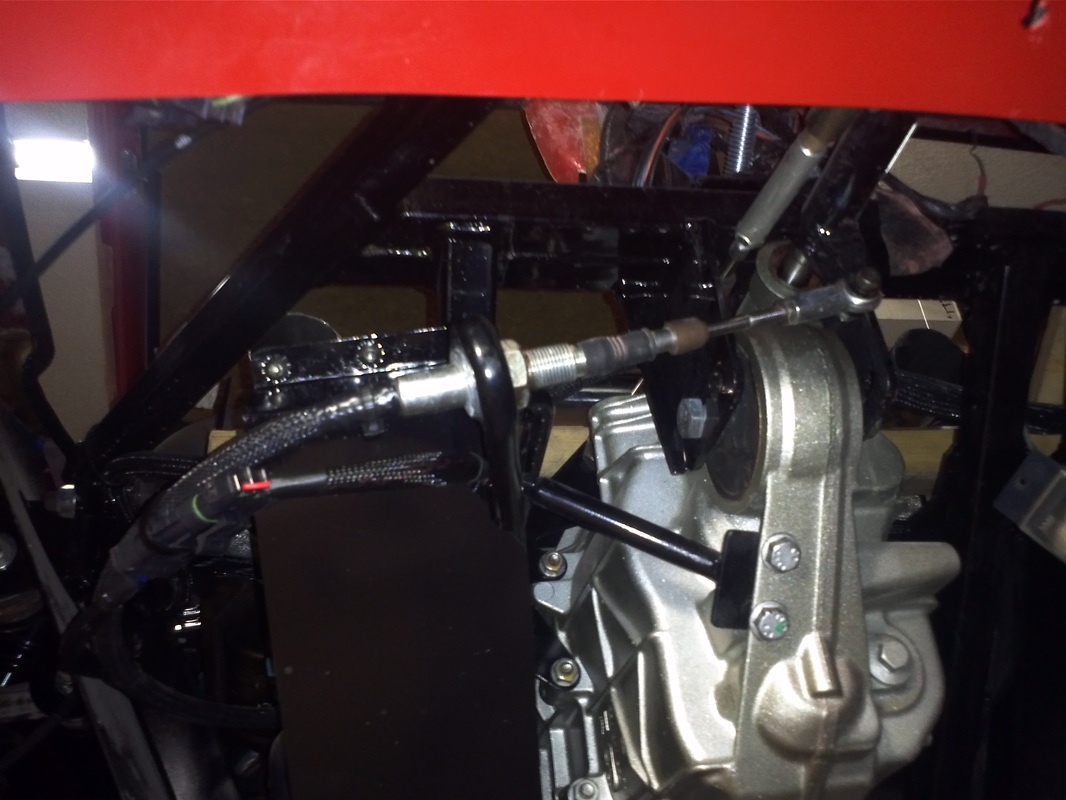
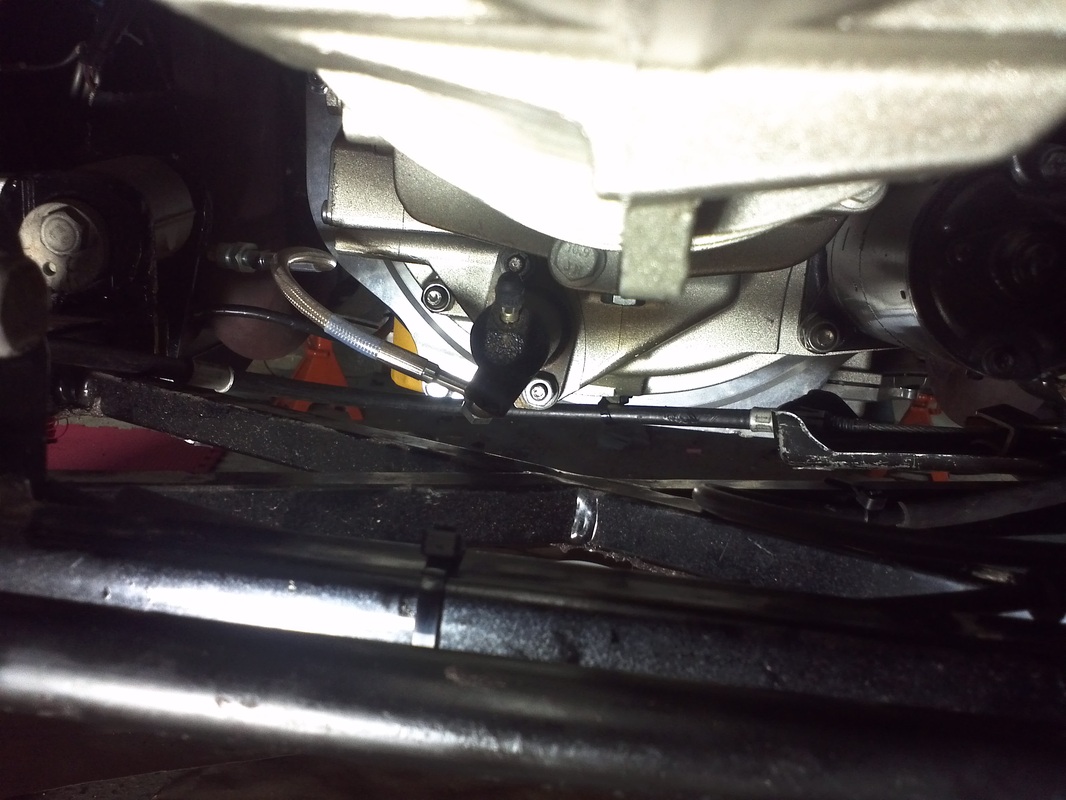
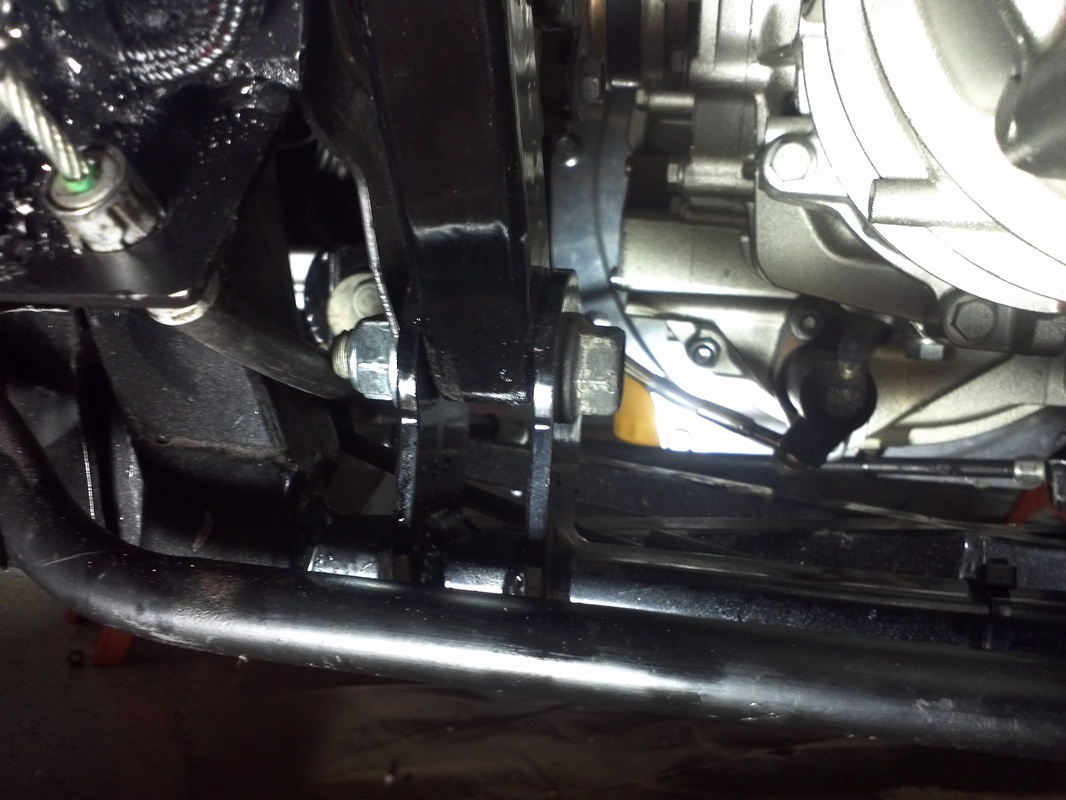
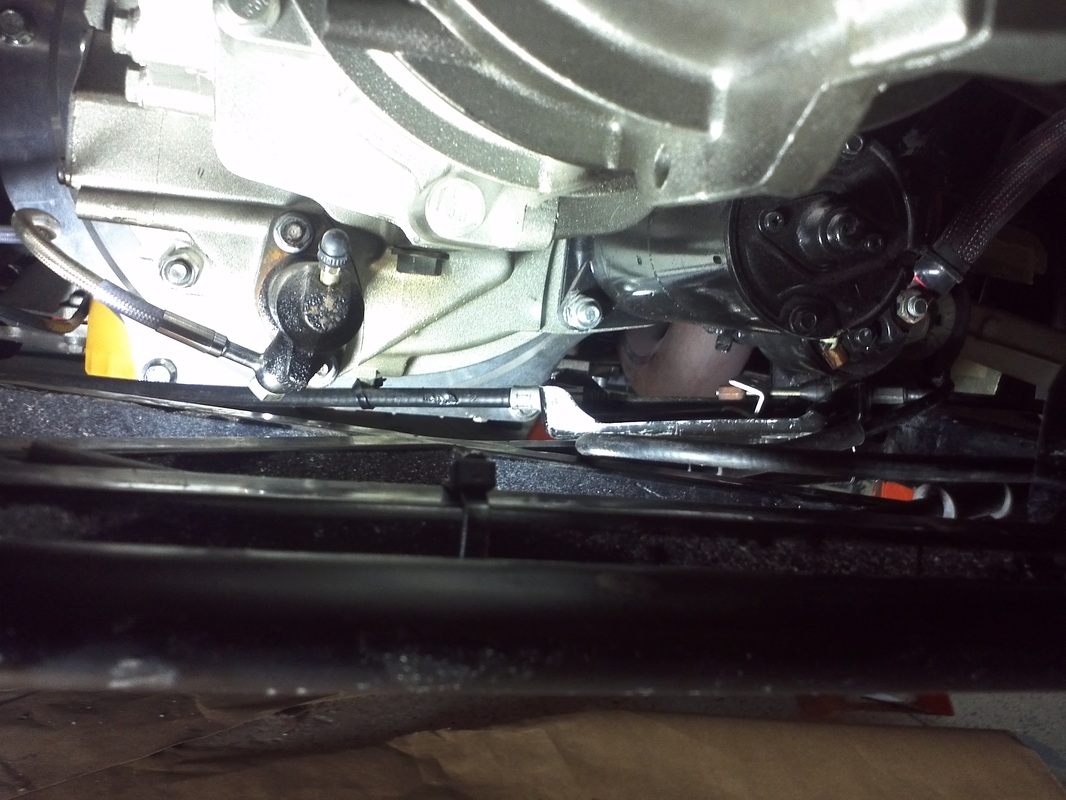
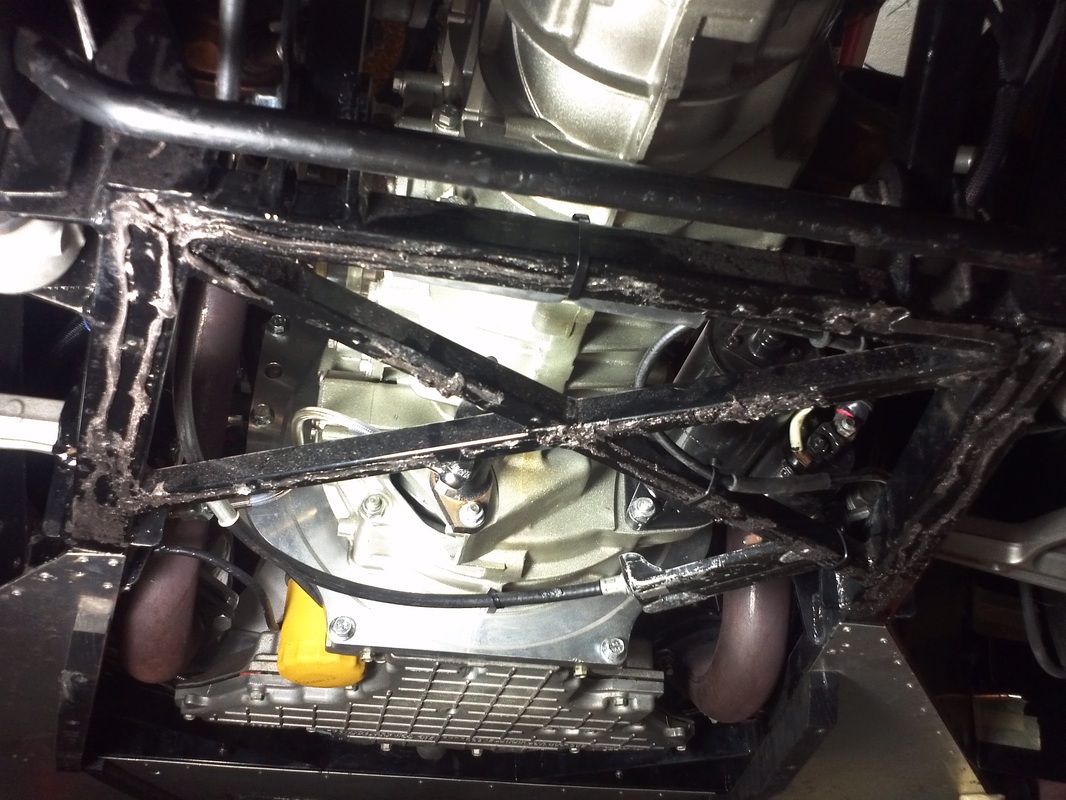
I am using a 2" throw linear actuator, a custom steel bracket and a micro-swith to physically take the place of the handle. The three make a unit that replaces the original hand actuated brake and keeps the parking brake light indication and features associated with it (DRL activation is one feature). My first attempt at locating the actuator and bracket was to put it in the vicinity of the original handle. But after some trial placement I decide to mount the actuator in the rear because I could not find a location that allowed me to get the 2 to 1 bracket in a better location and easy mounting of the new unit. I decided to mount the unit on the trans-axle frame just behind the emissions air blower. This location is a great location and gets the 2 to 1 bracket to a better location and not hanging below the engine's oil pan.
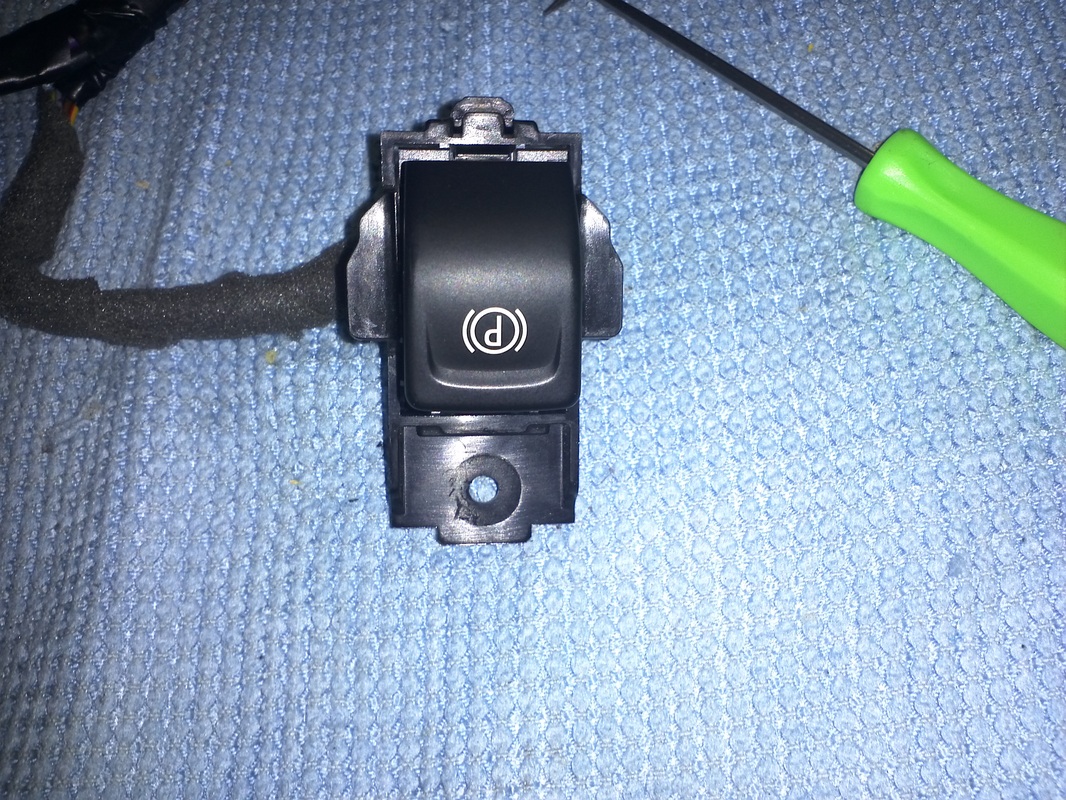
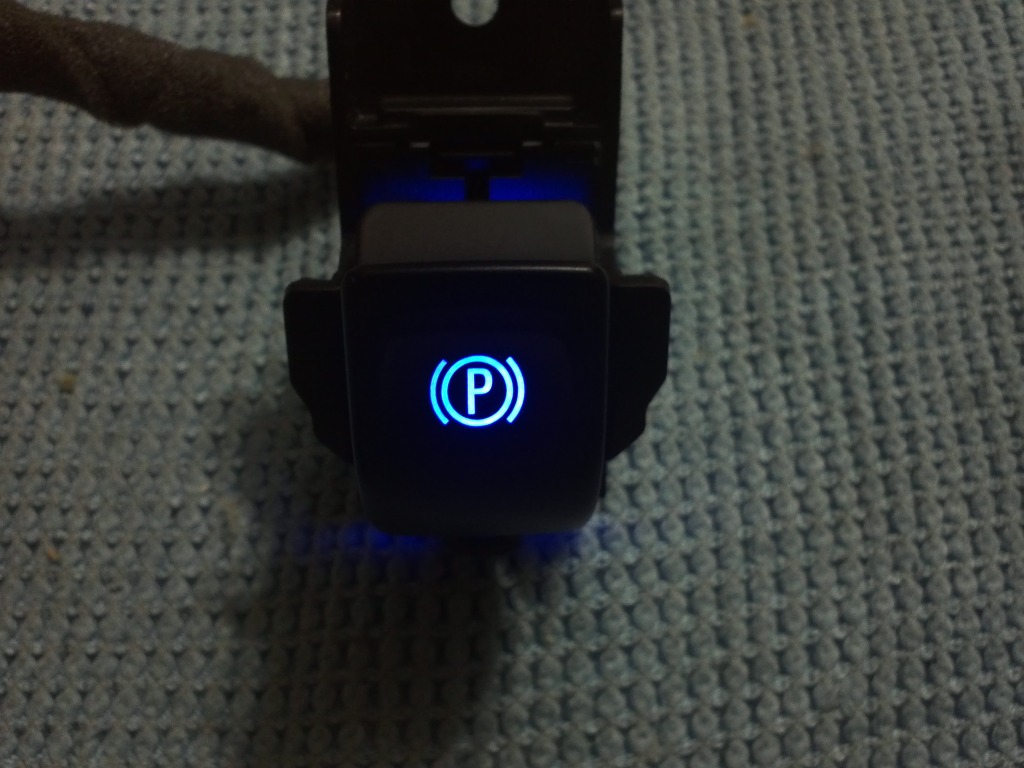
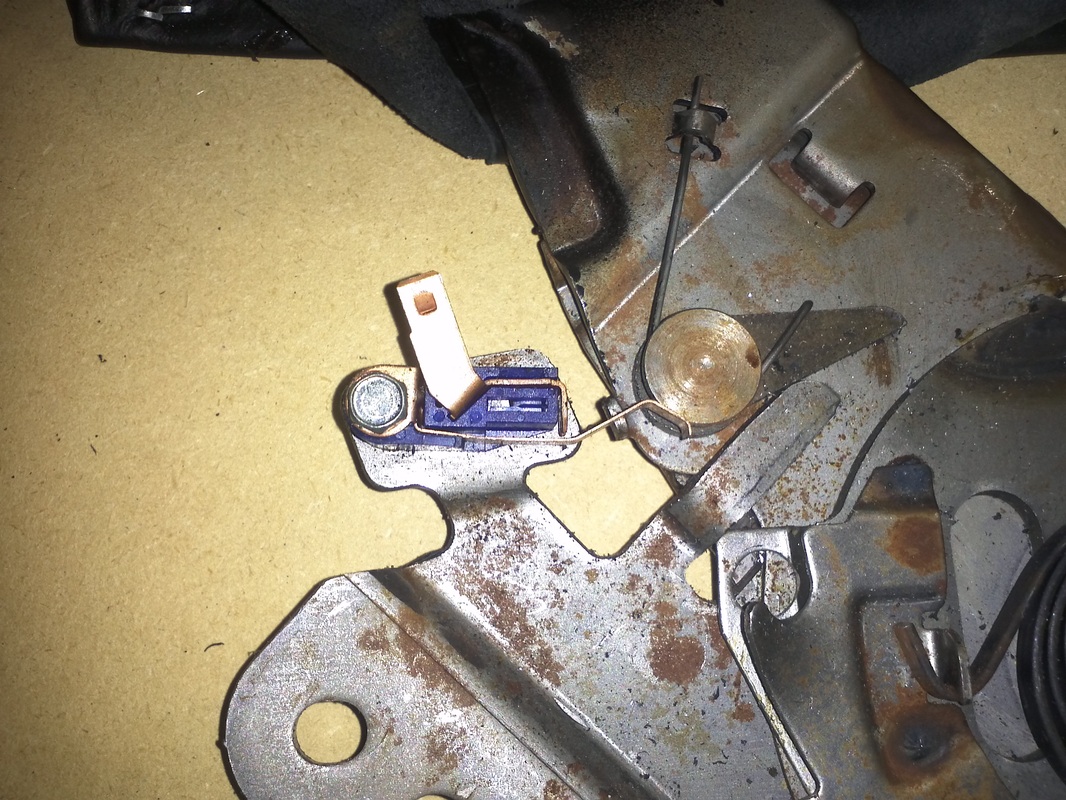
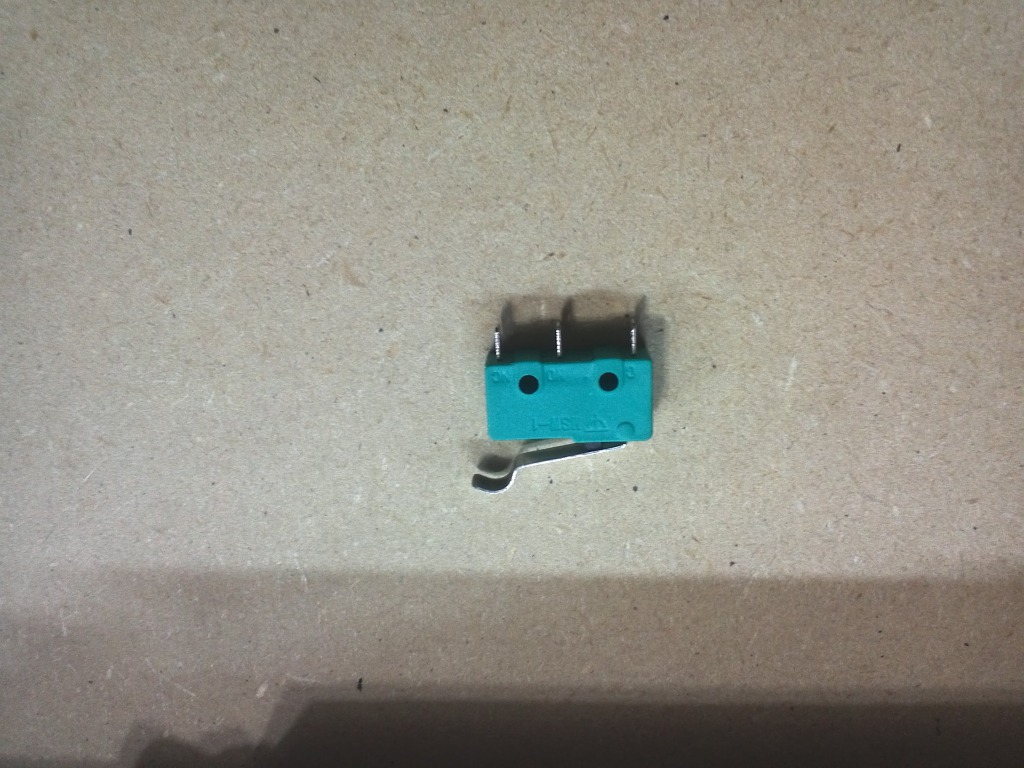
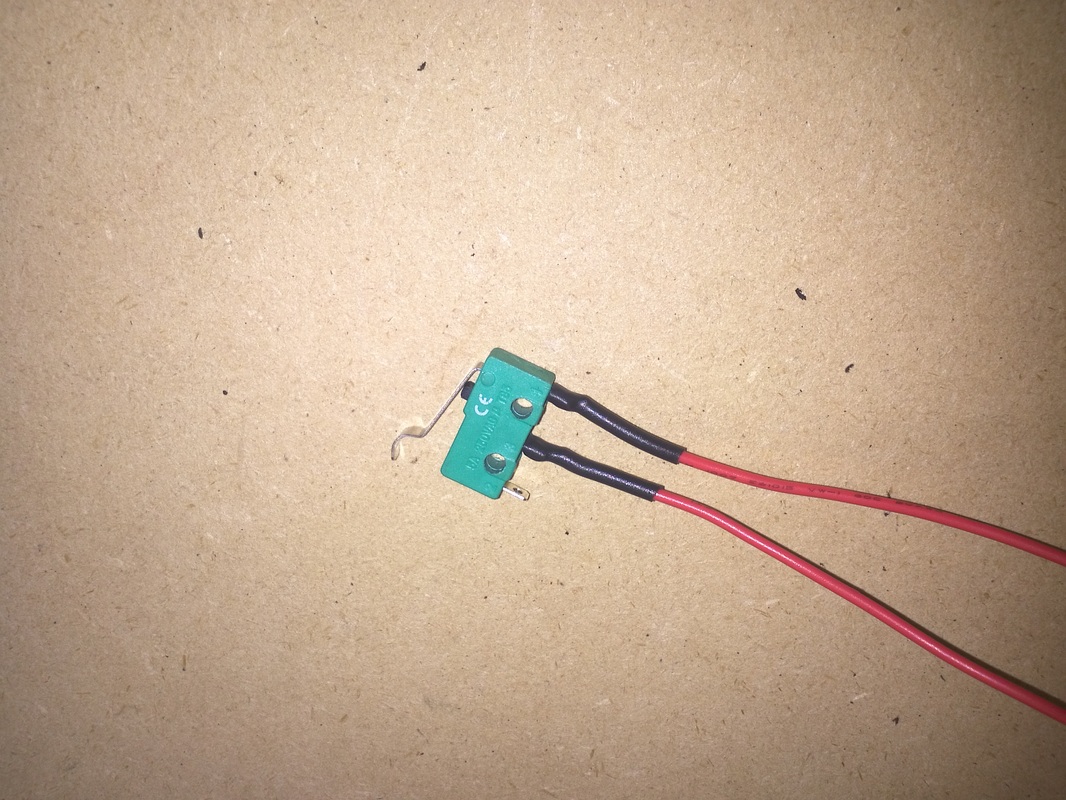
For full production car like operation a few additional items were required to complete the package. A parking brake switch, the circuit to power the system and some additional hardware. The switch I used was set up for a Normally Closed (NC) and switched to open operation. I did a minor rework of the switches' PCB to set up a Normally Open (NO) to closed operation. I also swapped the green LED of a blue LED.
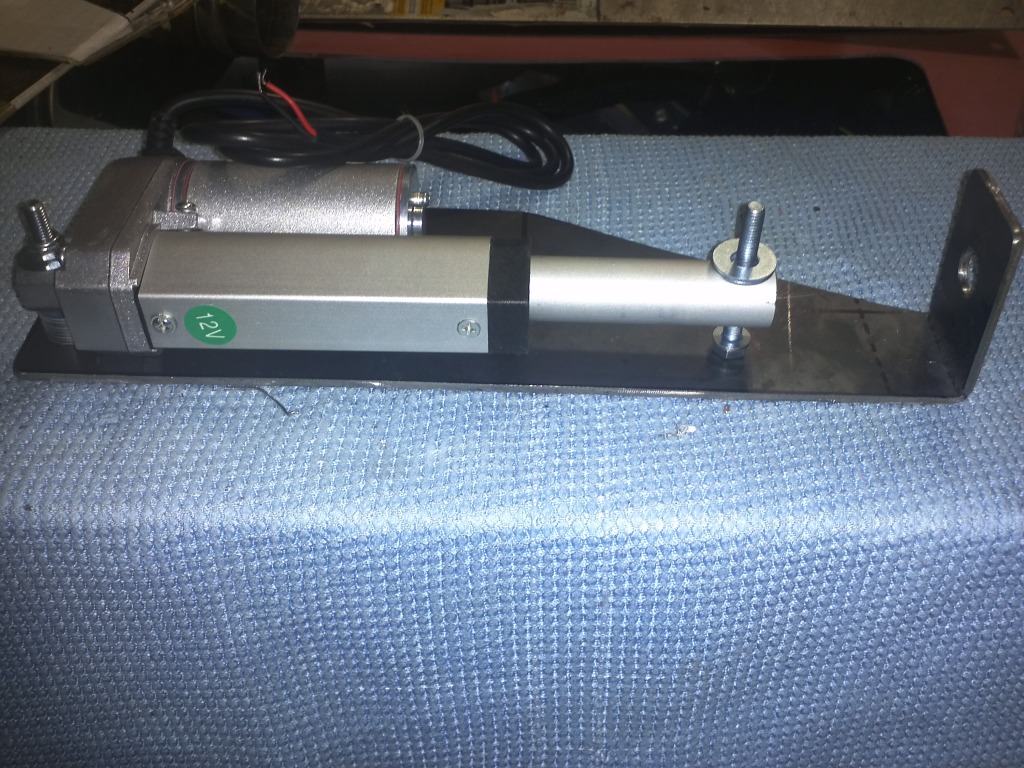
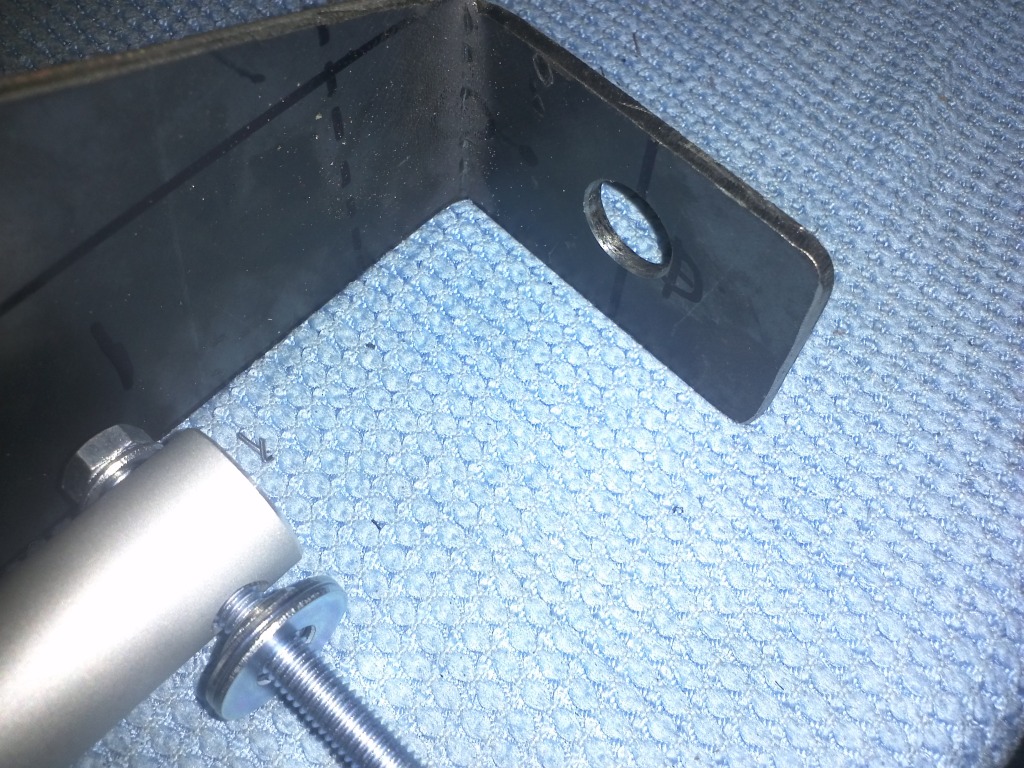
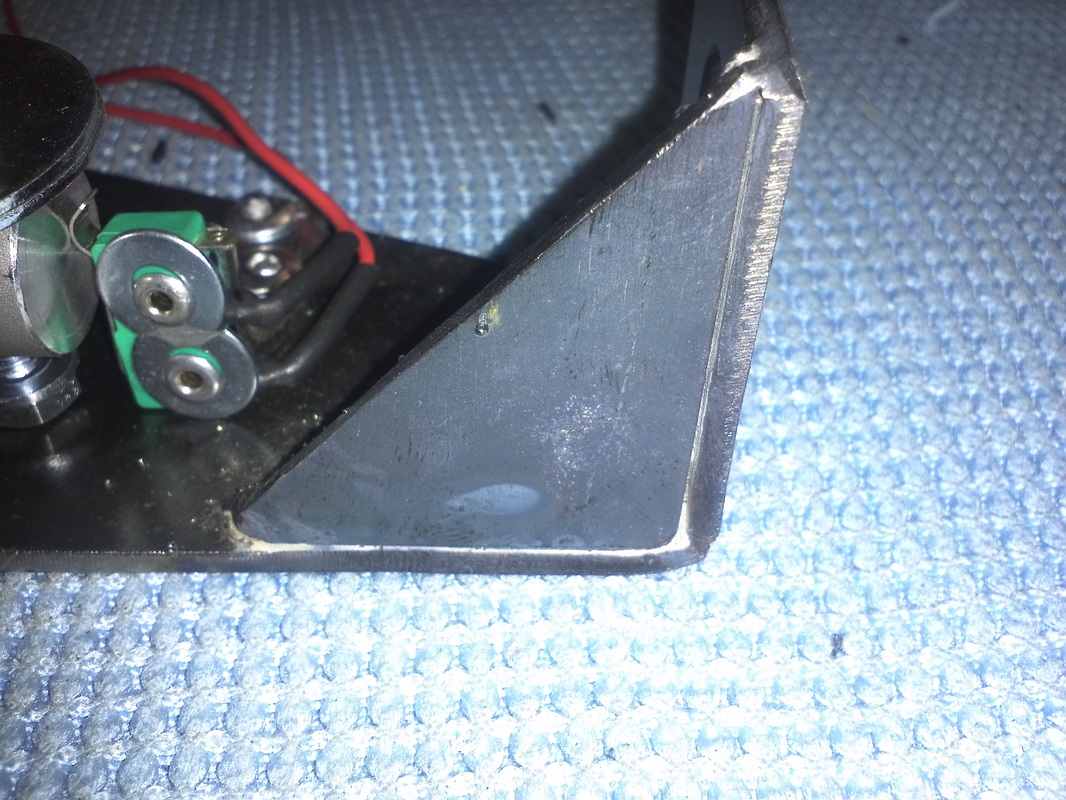
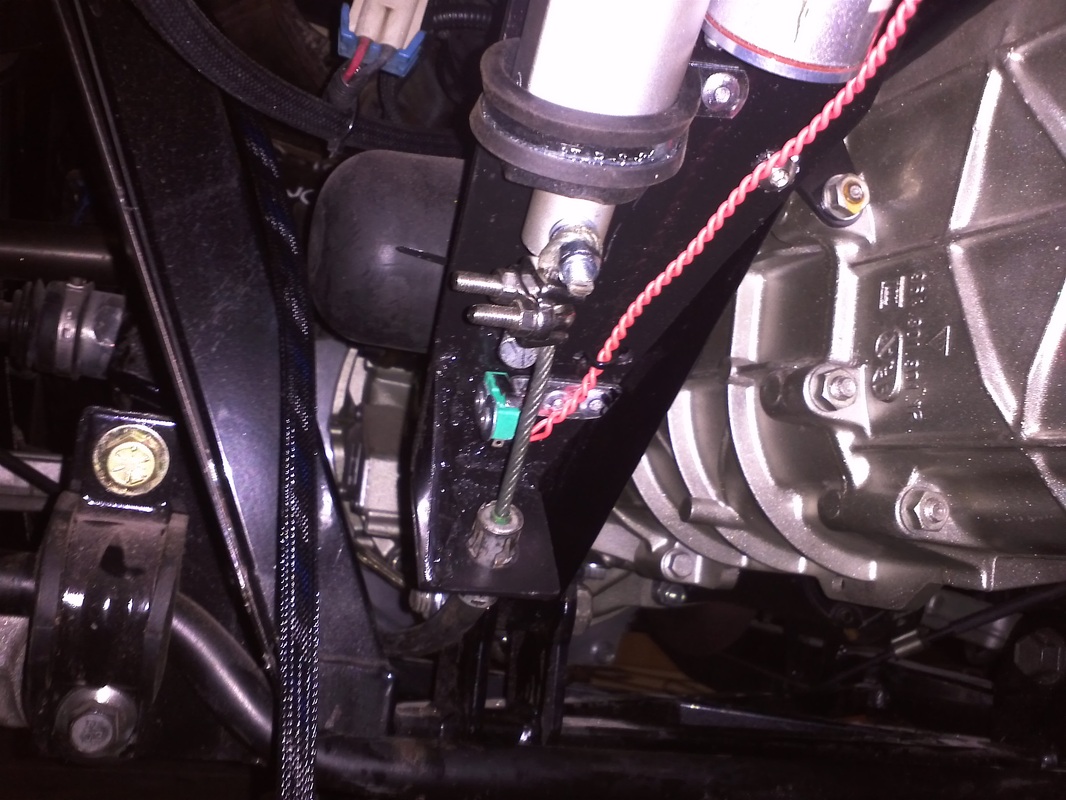
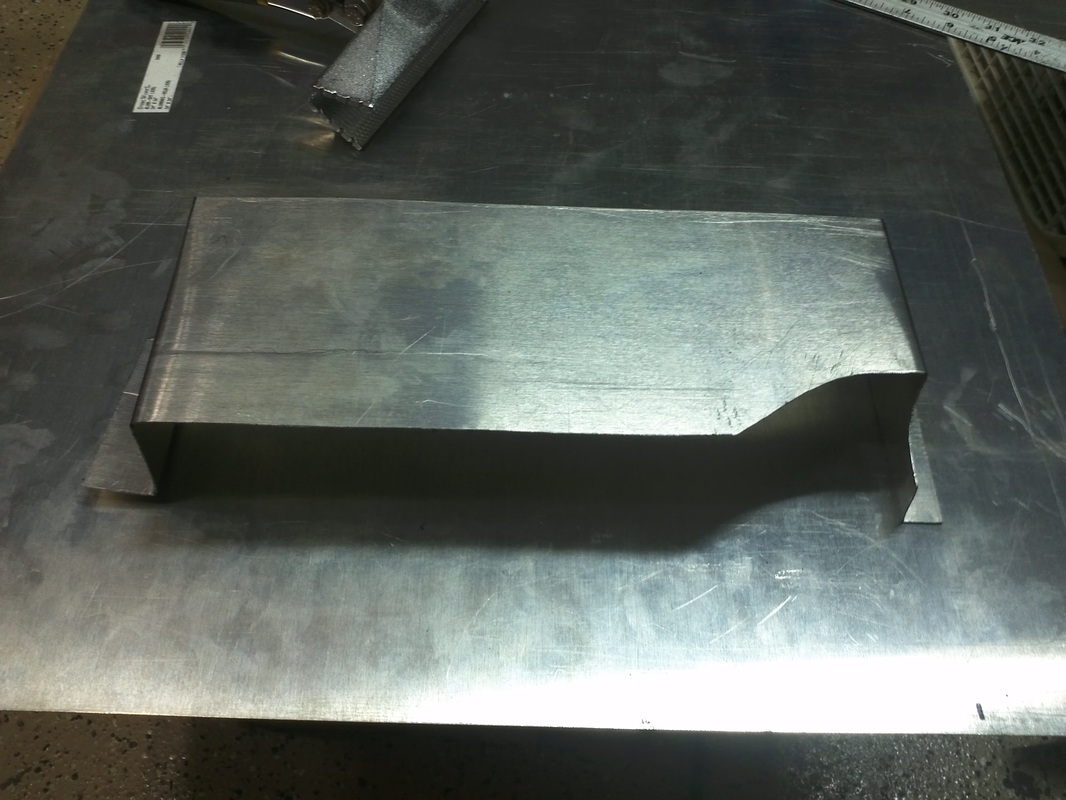
I drew up a bracket for the linear actuator and used 11guage steel. Since the actuator is capable of 225lbs of force and the brake will require a majority of that added a triangle gusset to reinforce the bracket. This was very apparent as I tested it without the gusset and watched as the 11 gauge steel bow with the last 1/4" -1/2" of movement (which was when the brake is actually being applied and restricting the rear wheels rotation.
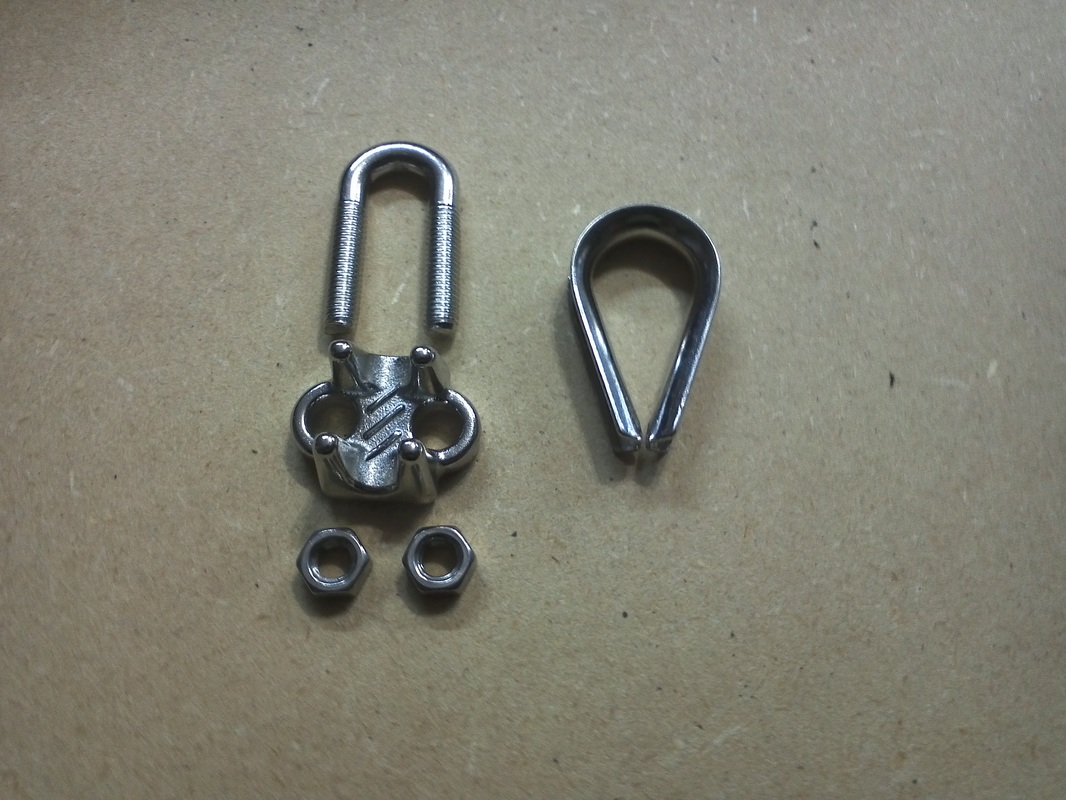
I used cable clamps, rated for 400lbs, to secure a loop around a stainless 6mm bolt attached to the actuator.
I set the system up to disengage the parking brake at engine start and to also use the brake pedal so that the parking brake switch circuit is powered anytime the brake pedal is depressed. I used a timer circuit, a reverse polarity relay circuit and a brake pedal activated relay. The timer circuit, reverse polarity relay circuit and brake pedal depressed for switch activation relay are placed under the dash and powered from an existing constant fused power, in the interior fuse panel. I fabbed some 14 gauge lines with braided covering and weather-tite connectors that are routed to the tunnel. It takes just under 5 seconds to the actuator to travel from one full position to the other. Even with the added stress for the last 1/2" to 1/4" when it is making that tight/full brake engagement. I would prefer it to be faster, but it is still quick enough.
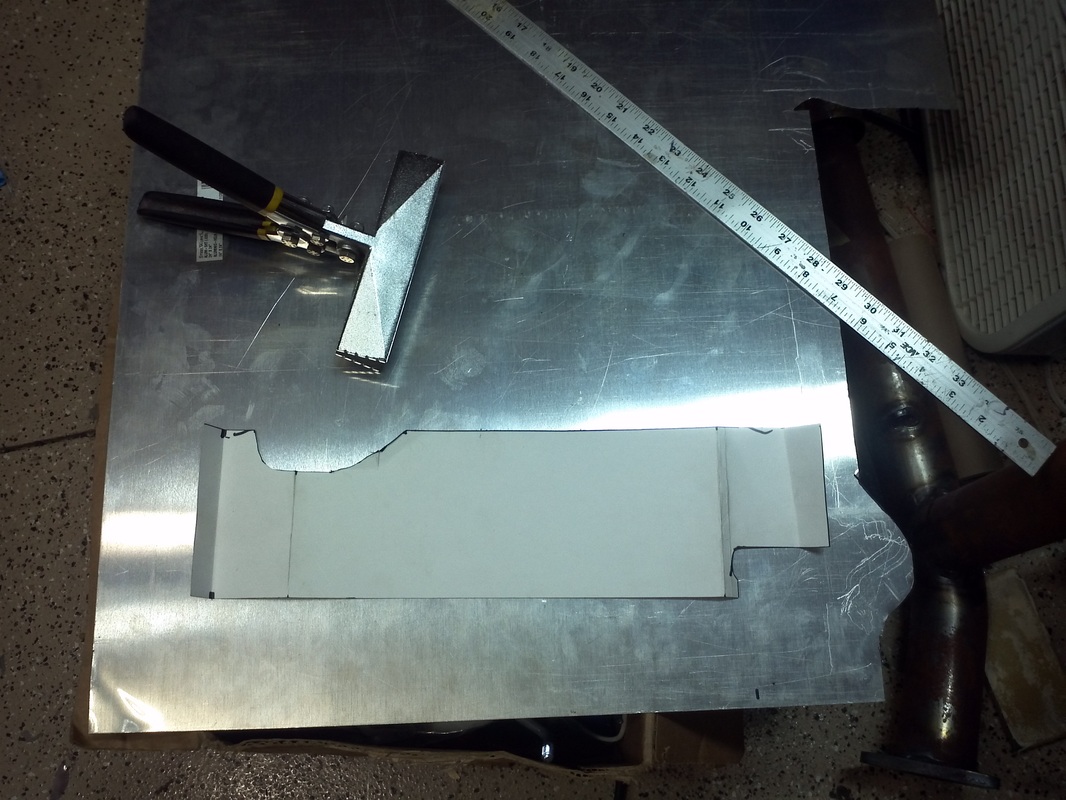
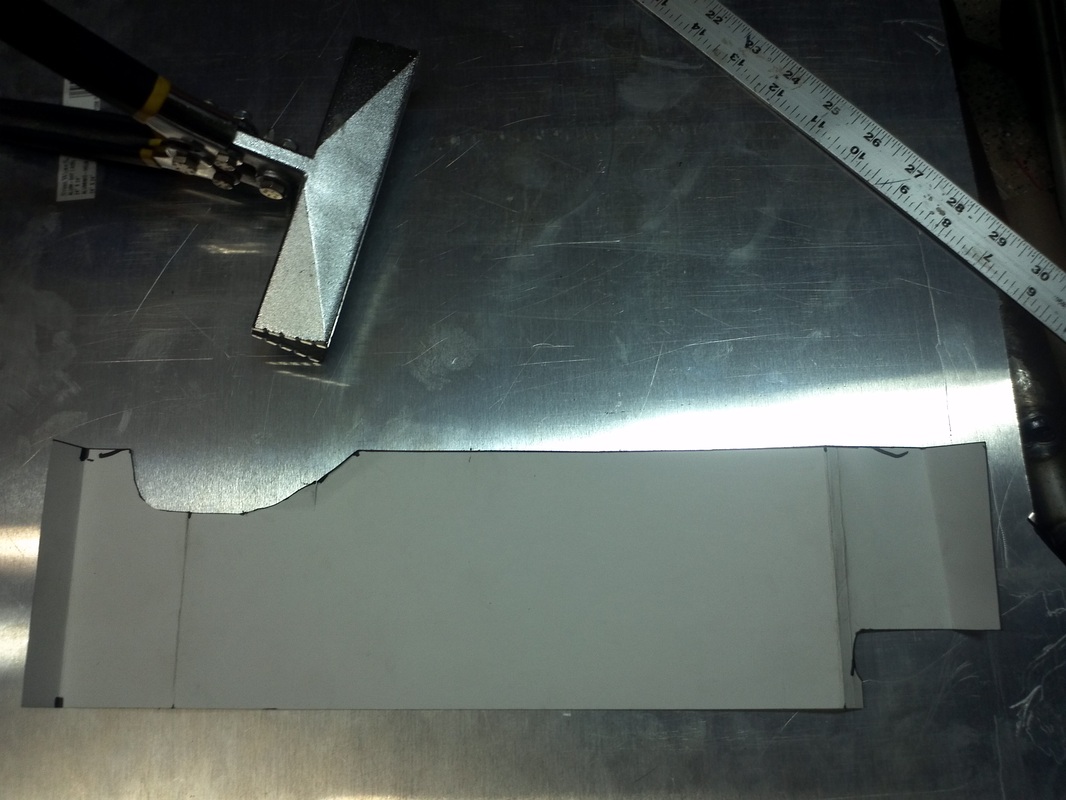
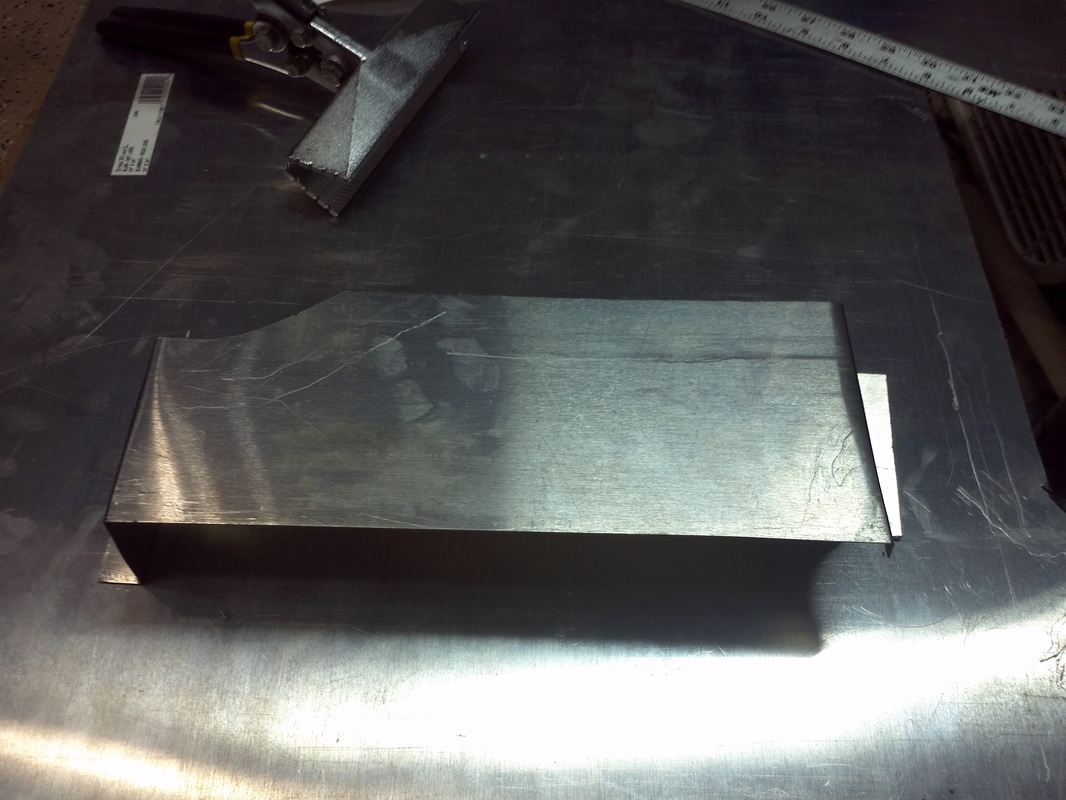
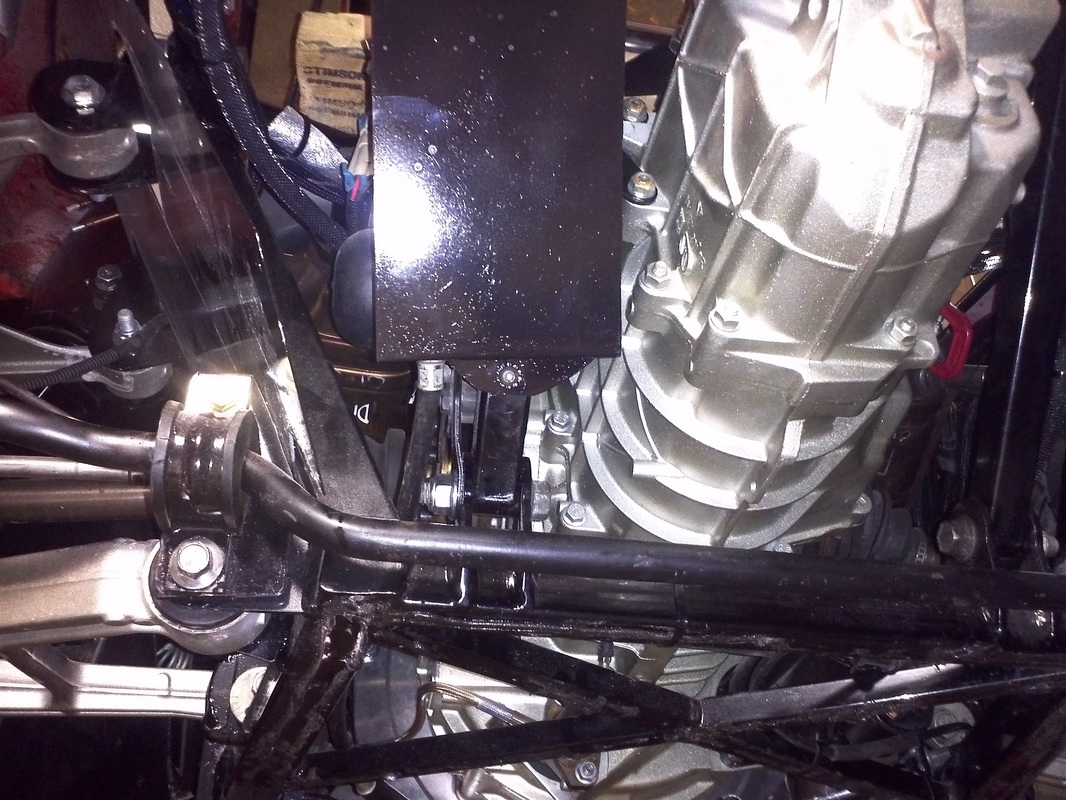
Since the unit can be seen through the LH side diffuser louvers and I fabb'd a panel to cover the actuator for both cosmetics and a little protection. I made an aluminum cover that I painted black and used 1/4-20 pan head bolts to secure.
I am using a 2" throw linear actuator, a custom steel bracket and a micro-swith to physically take the place of the handle. The three make a unit that replaces the original hand actuated brake and keeps the parking brake light indication and features associated with it (DRL activation is one feature). My first attempt at locating the actuator and bracket was to put it in the vicinity of the original handle. But after some trial placement I decide to mount the actuator in the rear because I could not find a location that allowed me to get the 2 to 1 bracket in a better location and easy mounting of the new unit. I decided to mount the unit on the trans-axle frame just behind the emissions air blower. This location is a great location and gets the 2 to 1 bracket to a better location and not hanging below the engine's oil pan.
For full production car like operation a few additional items were required to complete the package. A parking brake switch, the circuit to power the system and some additional hardware. The switch I used was set up for a Normally Closed (NC) and switched to open operation. I did a minor rework of the switches' PCB to set up a Normally Open (NO) to closed operation. I also swapped the green LED of a blue LED.
I drew up a bracket for the linear actuator and used 11guage steel. Since the actuator is capable of 225lbs of force and the brake will require a majority of that added a triangle gusset to reinforce the bracket. This was very apparent as I tested it without the gusset and watched as the 11 gauge steel bow with the last 1/4" -1/2" of movement (which was when the brake is actually being applied and restricting the rear wheels rotation.
I used cable clamps, rated for 400lbs, to secure a loop around a stainless 6mm bolt attached to the actuator.
I set the system up to disengage the parking brake at engine start and to also use the brake pedal so that the parking brake switch circuit is powered anytime the brake pedal is depressed. I used a timer circuit, a reverse polarity relay circuit and a brake pedal activated relay. The timer circuit, reverse polarity relay circuit and brake pedal depressed for switch activation relay are placed under the dash and powered from an existing constant fused power, in the interior fuse panel. I fabbed some 14 gauge lines with braided covering and weather-tite connectors that are routed to the tunnel. It takes just under 5 seconds to the actuator to travel from one full position to the other. Even with the added stress for the last 1/2" to 1/4" when it is making that tight/full brake engagement. I would prefer it to be faster, but it is still quick enough.
Since the unit can be seen through the LH side diffuser louvers and I fabb'd a panel to cover the actuator for both cosmetics and a little protection. I made an aluminum cover that I painted black and used 1/4-20 pan head bolts to secure.